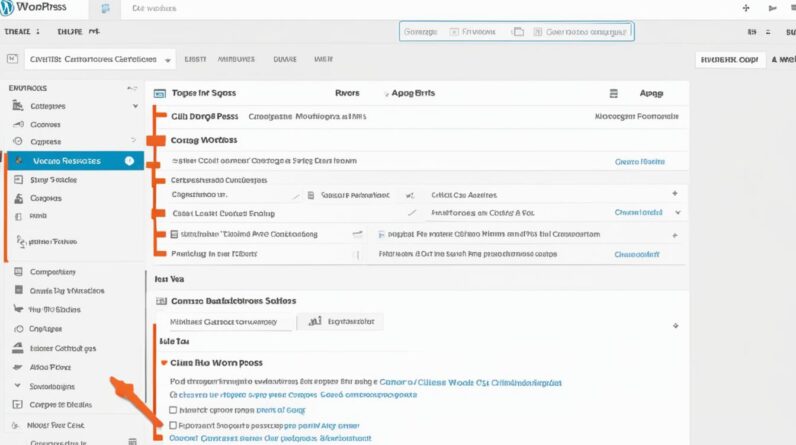
The WordPress navigation bar, also known as the menu, is a vital component of your website. It helps your visitors navigate through your content and find the information they need. In this guide, I will provide you with step-by-step instructions on how to edit and customize your WordPress navigation bar to make it unique and tailored to your website’s style. By the end of this guide, you will have the knowledge and tools to create a visually appealing and user-friendly navigation bar that enhances the overall user experience on your WordPress site.
How to Make Money with YouTube
Create an empire of automated video websites for multiple streams of income
Whether you’re a beginner or have some experience with WordPress, you’ll find the instructions easy to follow. I will refer to reliable sources, including the official WordPress support website, to ensure that you have accurate information and the latest updates. Let’s dive in and start editing your WordPress navigation bar!
Key Takeaways
- Editing your WordPress navigation bar allows you to personalize your website and improve user experience.
- Access the WordPress menu editor through the “Appearance” section in your WordPress dashboard.
- You can create a custom menu from scratch or modify an existing menu to suit your needs.
- Add pages, posts, categories, and custom links to your menu to provide easy navigation for your visitors.
- Customize the appearance of your menu using your theme’s options or additional CSS styling.
Finding the WordPress Menu Editor
To begin editing your WordPress navigation bar, you need to locate the WordPress menu editor. There are two ways to access it:
-
Option 1: Log in to your WordPress dashboard and navigate to the “Appearance” section. From there, you can find the “Menus” option. This is the traditional and direct way to access the menu editor.
-
Option 2: Another way to access the menu editor is through the theme customizer screen. Log in to your WordPress dashboard, go to the “Appearance” section, and click on “Customize.” This will open the theme customizer screen, where you can find the option to edit your menus. This method allows you to see a live preview of your changes as you work on the menu.
Both options offer similar functionality, so choose the one that you find most convenient and user-friendly.
Now that you know how to find the WordPress menu editor, let’s move on to the next section to learn how to create a custom menu in WordPress.
Creating a Custom Menu in WordPress
Once you have accessed the WordPress menu editor, you can begin creating a custom menu. If you don’t already have a menu, you can click the “Create a New Menu” link to get started. You will be prompted to give your menu a name and choose where it should be displayed on your site. Once these requirements are filled, you can start adding items to your menu, such as pages, posts, and custom links.
Creating a custom menu in WordPress allows you to have full control over the navigation bar on your website. Whether you want to showcase specific pages, highlight important posts, or include external links, creating a custom menu gives you the flexibility to tailor your site’s navigation to suit your needs.
Follow these steps to create a custom menu in WordPress:
- Access the WordPress menu editor by logging in to your WordPress dashboard.
- Navigate to the “Appearance” section and click on “Menus”.
- If you don’t have an existing menu, click the “Create a New Menu” link.
- Give your menu a name and choose where you want it to be displayed on your site.
- Click the “Create Menu” button to proceed.
- You can now start adding items to your menu. Choose from pages, posts, categories, or create custom links.
- To add items to your menu, select them from the available options and click the “Add to Menu” button.
- Arrange the menu items by dragging and dropping them into the desired order.
- Save your menu once you’re satisfied with the setup.
By creating a custom menu in WordPress, you can ensure that your website’s navigation is intuitive and user-friendly. Take advantage of this powerful feature to guide your visitors through your site and enhance their overall browsing experience.
With a custom menu, you have the freedom to organize your content, highlight your most important pages and posts, and create a seamless user journey. Don’t underestimate the impact of a well-designed navigation bar on your website’s usability and visitor engagement. Start creating your custom menu in WordPress today!
Editing an Existing Menu in WordPress
If you already have a menu and want to make changes to it, you can easily edit it in the WordPress menu editor. Here’s how:
- Go to the “Appearance” section in your WordPress dashboard.
- Click on “Menus”.
- If you have multiple menus, select the one you want to edit from the dropdown menu.
- Now, you can make various modifications to customize your navigation bar:
Adding or Removing Items:
You can add new items to your menu by selecting them from the available options on the left-hand side and clicking on the “Add to Menu” button. To remove an item, simply click on the arrow next to it and then click on the “Remove” link.
Rearranging Menu Items:
To change the order of menu items, use the drag-and-drop functionality. Click and hold the item you want to move, then drag it to the desired position.
Modifying Menu Item Details:
If you want to change the label or URL of a menu item, you can do so by expanding the item in the menu editor. Here, you can edit the navigation label, enter a custom URL, or add a CSS class.
If needed, you can also create submenus or dropdown menus by dragging and indenting items under the parent menu item.
Once you’ve made all the desired changes, remember to click the “Save Menu” button to apply your edits.
It’s always a good idea to preview your website after saving the menu to ensure that your changes appear correctly and provide a seamless user experience.
Now that you know how to edit an existing menu in WordPress, you can easily customize your navigation bar to match your website’s needs and design.
| Actions | Instructions |
|---|---|
| Add an item to the menu | Select the desired item from the available options on the left and click on “Add to Menu”. |
| Remove an item from the menu | Click on the arrow next to the item and then click on “Remove”. |
| Rearrange menu items | Drag and drop the items to the desired positions. |
| Edit menu item details | Expand the item in the menu editor and modify the navigation label, URL, or add a CSS class. |
| Create submenus/dropdown menus | Drag and indent items under the parent menu item. |
| Save the edited menu | Click on the “Save Menu” button to apply your changes. |
Adding Items to Your WordPress Menu
To fully customize your WordPress navigation bar, it’s crucial to add items to your menu. With the WordPress menu editor, you can effortlessly incorporate pages, posts, categories, and custom links into your menu. Let me guide you through the straightforward process.
Adding Pages and Posts to Your Menu
If you want to include specific pages or posts in your menu, you have two options. First, you can browse through the available options and select the ones you desire. Alternatively, you can use the search function to find specific pages or posts quickly. Once you’ve located the desired content, simply click on it to add it to your menu.
- Click on the “Pages” or “Posts” tab in the WordPress menu editor.
- Browse the list of available pages or posts.
- Select the ones you want to add to your menu. You can hold the “Ctrl” key (or “Cmd” on a Mac) to select multiple items.
- Click the “Add to Menu” button to incorporate them into your menu.
Adding pages and posts to your menu enables visitors to navigate your website efficiently, allowing them to access essential content without any hassle.
Creating Dropdown Menus
Dropdown menus are a fantastic way to organize your site’s navigation and categorize your content. To create a dropdown menu, follow these steps:
- Add a new page or select an existing one that will serve as the parent item for your dropdown menu.
- Drag and drop another page below the parent item in the WordPress menu editor.
- Indent the child page slightly to the right, indicating that it is a sub-item.
- Repeat this process to add more child pages under the parent item.
- Save your menu to activate the dropdown functionality.
Dropdown menus provide a structured and organized navigation experience, enhancing user convenience and improving overall website usability.
Adding Custom Links
In addition to pages and posts, you can include custom links in your WordPress menu. Custom links allow you to direct visitors to external websites, internal anchor links, or any URL of your choice. To add a custom link:
- Click on the “Custom Links” tab in the WordPress menu editor.
- Enter the URL in the “URL” field.
- Add the link text in the “Link Text” field (e.g., “Contact”, “About Us”).
- Click the “Add to Menu” button to include the custom link in your menu.
By incorporating custom links, you can easily connect visitors to relevant external resources or specific sections within your website.
Now that you know how to add items to your WordPress menu, you can organize your content effectively and improve navigation for your visitors.
Changing the Appearance of Your WordPress Menu
Your WordPress theme plays a significant role in determining the visual appearance of your navigation menu. However, you have the flexibility to customize and personalize the design of your menu using the various options provided by your theme. This allows you to create a unique and visually appealing navigation experience for your website visitors.
When customizing the appearance of your WordPress menu, you can consider making changes to elements such as:
- Font: Modify the font style, size, and weight of your menu items to match your brand aesthetic.
- Colors: Choose colors that align with your overall website design. You can customize the background color of your menu, the color of menu items on hover or active states, and more.
- Spacing: Adjust the padding and margin values to control the spacing between your menu items, giving your menu a clean and organized look.
- Visual Aspects: Explore additional visual options offered by your theme, such as adding icons, images, or a search bar to your menu. These elements can enhance the usability and interactivity of your navigation bar.
Many WordPress themes also offer pre-designed menu styles that you can choose from. These styles provide ready-made designs for your menu, saving you time and effort. Additionally, some themes allow you to integrate social media icons directly into your menu, making it easy for visitors to connect with your social platforms.
To customize the appearance of your WordPress menu, access the theme customization options available in your WordPress dashboard. Depending on your theme, you may find these options under the “Appearance” or “Customize” section. Exploring these customization options will help you transform your navigation bar into an aesthetically pleasing and user-friendly element of your website.
Now that you have learned how to customize the appearance of your WordPress menu, let’s proceed to the next section to discover how to activate and display your menu on your website.
Activating and Displaying Your WordPress Navigation Menu
Once you have customized your WordPress navigation menu, it’s time to activate it and choose where you want it to appear on your website. The WordPress menu editor provides an easy way to select a display location for your menu, such as the header or sidebar.
By activating your menu, you ensure that visitors can access and navigate your site with ease. Whether you have a simple menu with a few items or a complex menu with dropdowns and submenus, activating it is a crucial step in the process.
Here’s how you can activate and display your WordPress navigation menu:
- Login to your WordPress dashboard.
- Navigate to the “Appearance” section.
- Click on “Menus.”
- Choose the menu you want to activate from the dropdown menu (if you have multiple menus).
- Select the display location for your menu, such as the header or sidebar.
- Save your changes.
Previewing Your Menu
It’s always a good idea to preview your site after activating your menu to ensure it appears correctly. A preview allows you to see how your menu looks in the context of your website’s design and layout.
By previewing your menu, you can identify any issues or inconsistencies and make necessary adjustments. This step ensures that your visitors have a seamless navigation experience when they explore your website.
Here’s an example of how the WordPress menu editor looks:
Now that you have successfully activated and displayed your WordPress navigation menu, it’s time to move on to the next step: changing the position of your menu.
Changing the Position of Your WordPress Menu
If you’re not satisfied with the default position of your WordPress menu, don’t worry! You have the power to change it according to your preferences. The WordPress menu editor provides you with a variety of options to rearrange the order of menu items and assign different menus to different locations on your site.
One of the easiest ways to rearrange your menu items is by using the drag-and-drop interface. Simply click on a menu item and drag it to your desired position. This allows you to create a hierarchical structure for submenus or dropdown menus, making the navigation bar more organized and intuitive.
Here’s a step-by-step guide to changing the position of your WordPress menu:
- Log in to your WordPress dashboard.
- Navigate to the “Appearance” section.
- Click on “Menus.”
- Select the menu you want to edit from the dropdown menu, if you have multiple menus.
- Use the drag-and-drop interface to rearrange the order of menu items.
- Save your changes once you’re satisfied with the new position of your menu items.
By following these simple steps, you can effortlessly customize the layout and structure of your WordPress navigation menu. Take advantage of the flexibility offered by the WordPress menu editor and create a menu that best suits your website’s needs.
Now, let’s take a look at an example of how you can change the position of your WordPress menu:
| Menu Item | Default Position | New Position |
|---|---|---|
| Home | 1 | 2 |
| About Us | 2 | 1 |
| Products | 3 | 3 |
| Services | 4 | 4 |
As you can see from the example above, the “Home” and “About Us” menu items have been swapped to achieve a different position in the navigation menu.
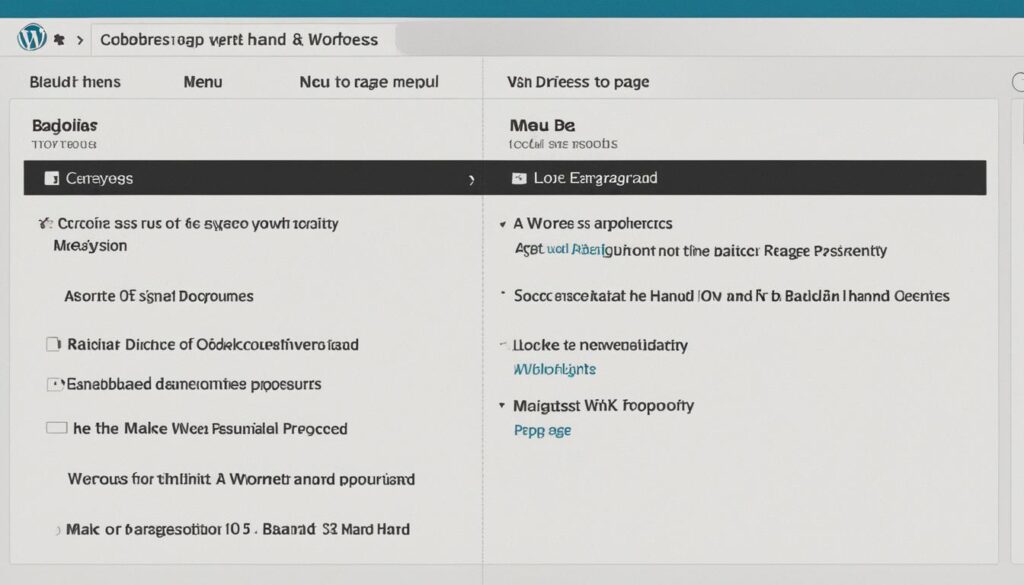
Changing the position of your WordPress menu is a simple yet effective way to enhance the user experience of your website. By reordering your menu items and creating a logical menu structure, you can make it easier for visitors to navigate through your site and find the content they’re looking for.
Updating Menus in WordPress in 2022
WordPress has undergone updates since the creation of this guide, which was based on WordPress version 4.01 in 2014. While the menu editing process remains largely the same, a few minor changes are worth noting.
Accessing the Menu Settings
To edit menus in WordPress, you can now access the menu settings through the Appearance → Customize option. This allows for a more streamlined editing experience, as you can make changes to your menu directly from the customizer screen.
Location of the Save Menu Button
In the updated WordPress version, the location of the Save Menu button has been moved. Previously, the button was located at the bottom of the menu editor. However, in the new interface, you can find the Save Menu button in the top right corner. Be sure to save your changes before leaving the menu editor.
Selecting Multiple Menu Items for Deletion
Another improvement in the menu editing experience is the ability to select multiple menu items for deletion. In the previous version, you had to delete menu items one by one. With the updated WordPress, you can now select and remove multiple items at once, making it faster and more efficient to update your menu.
Keeping up with the latest updates ensures that you have a seamless menu editing experience in WordPress. Be sure to familiarize yourself with the changes mentioned above to make the most out of the updated WordPress menu editing tools.
| Old Version (WordPress 4.01) | New Version (WordPress 5.8) |
|---|---|
| Access menu editor through Appearance | Access menu settings through Appearance → Customize |
| Save Menu button at the bottom | Save Menu button in the top right corner |
| Can only delete one item at a time | Can select and delete multiple items at once |
Advanced Menu Capabilities in WordPress
In addition to the basic customization options, WordPress offers advanced menu capabilities that allow you to maximize the functionality of your navigation bar. These advanced features enable you to create a unique and user-friendly experience for your website visitors.
One of the advanced menu capabilities is the ability to create custom dropdown menus. With this feature, you can organize your menu items in a hierarchical structure, making it easier for users to navigate through your website. By providing nested menu options, you can ensure that visitors can quickly access specific sections or pages that are relevant to their interests.
Another exciting capability is the option to add icons or images to your menu items. This visual enhancement not only adds an aesthetic appeal to your navigation bar but also helps in highlighting specific categories, pages, or sections. By incorporating relevant icons or images, you can improve the overall user experience and make your menu more engaging and intuitive.
Utilizing custom CSS for styling is another powerful capability offered by WordPress. This feature allows you to customize the appearance of your menu items according to your branding or design preferences. Whether it’s changing the font, colors, spacing, or even adding animation effects, custom CSS gives you the flexibility to create a navigation bar that aligns perfectly with the visual identity of your website.
Furthermore, WordPress enables you to integrate plugin functionalities into your menu. This opens up endless possibilities for enhancing the functionality of your navigation bar. For example, you can add a search bar to your menu, display social media buttons, or incorporate interactive elements such as a language switcher or a login/logout widget. By utilizing plugins, you can extend the capabilities of your menu and provide additional value to your website visitors.
Here’s an example of how advanced menu capabilities can be applied:
| Menu Feature | Description |
|---|---|
| Dropdown Menus | Create nested menus for organized navigation. |
| Icons or Images | Add visual elements to highlight menu items. |
| Custom CSS | Customize the appearance of the menu using CSS. |
| Plugin Integration | Enhance functionality with integrated plugins. |
By leveraging these advanced menu capabilities in WordPress, you can take your navigation bar to the next level and provide an exceptional user experience on your website. Whether you’re aiming for a professional corporate look, a vibrant and creative design, or something entirely unique, WordPress empowers you with the tools to make it happen.
Conclusion
In conclusion, editing and customizing your WordPress navigation bar is a simple yet powerful process that can greatly enhance the user experience of your website. By following the steps outlined in this guide, you can create a personalized and visually appealing menu that reflects your style and effectively helps visitors navigate your site.
Remember, regularly updating and optimizing your menu is essential to ensure it accurately reflects changes to your site’s content and structure. By staying up-to-date and utilizing the right tools and knowledge, you can confidently edit your WordPress navigation bar to meet your website’s needs and provide a seamless browsing experience for your visitors.
In summary, the WordPress menu editor is a user-friendly interface that allows you to easily create, edit, and organize your navigation menu. From creating custom menus to adding items, changing the appearance, and even rearranging menu items, you have full control over your navigation bar’s design and functionality.
Final thoughts – optimizing your WordPress navigation bar is a critical aspect of website design and can significantly impact user engagement and satisfaction. By investing time and effort into customizing your menu, you can create a seamless navigation experience that showcases your content and makes it easily accessible to your visitors. So, don’t overlook the importance of your WordPress navigation bar – it’s a powerful tool that can elevate your website’s overall user experience.
FAQ
How do I edit the navigation bar in WordPress?
To edit the navigation bar in WordPress, you can use the WordPress menu editor. Access the editor by logging in to your WordPress dashboard, navigating to the “Appearance” section, and selecting “Menus” or by using the theme customizer screen.
How do I create a custom menu in WordPress?
To create a custom menu in WordPress, go to the WordPress menu editor and click the “Create a New Menu” link. Give your menu a name, choose where it should be displayed on your site, and start adding items to it.
How do I edit an existing menu in WordPress?
To edit an existing menu in WordPress, go to the WordPress menu editor in the “Appearance” section and select the menu you want to edit. From there, you can add or remove items, rearrange the order of menu items, and make other modifications.
How do I add items to my WordPress menu?
To add items to your WordPress menu, use the WordPress menu editor. You can easily add pages, posts, categories, and custom links to your menu. Select the desired items from the available options or search for specific ones.
How do I change the appearance of my WordPress menu?
To change the appearance of your WordPress menu, customize the design options provided by your theme. You can change the font, colors, spacing, and other visual aspects of your menu. Some themes offer pre-designed menu styles or the ability to add social media icons.
How do I activate and display my WordPress navigation menu?
To activate and display your WordPress navigation menu, use the WordPress menu editor to select a display location for your menu, such as the header or sidebar. You can also choose not to display the menu until you’re finished editing it.
How do I change the position of my WordPress menu?
To change the position of your WordPress menu, use the WordPress menu editor to rearrange the order of menu items and assign different menus to different locations on your site. You can use the drag-and-drop interface to move menu items and create a hierarchical structure for submenus or dropdown menus.
Are there any updates to the WordPress menu editing process?
Yes, there have been some updates to the WordPress menu editing process since 2014. These updates include accessing the menu settings through the Appearance → Customize option, changes to the location of the Save Menu button, and the option to select multiple menu items for deletion.
What advanced menu capabilities does WordPress offer?
WordPress offers advanced menu capabilities, such as creating custom dropdown menus, adding icons or images to menu items, utilizing custom CSS for styling, and integrating plugin functionalities into your menu. These features enhance the functionality and user experience of your navigation bar.
How do I update and optimize my WordPress menu?
It’s important to regularly update and optimize your WordPress menu to reflect any changes to your site’s content and structure. Use the WordPress menu editor to make necessary changes, preview your site after saving the menu, and ensure it appears correctly to visitors.

