Your WordPress menu is a crucial part of your website’s navigation. It allows visitors to easily find their way around your site’s pages and content. In this comprehensive guide, I will show you how to edit your WordPress menu step-by-step, covering everything from accessing the menu settings to customizing its appearance and adding new menu items. By the end of this guide, you’ll have the knowledge and confidence to effortlessly modify your WordPress menu to suit your site’s needs.
How to Make Money with YouTube
Create an empire of automated video websites for multiple streams of income
Key Takeaways:
- Learn how to access the WordPress menu editor and navigate menu settings
- Understand the basic structure of WordPress menus, including menu items and submenus
- Discover different methods for editing your WordPress menu, including using the dashboard, full site editor, plugins, and CSS
- Gain insights into best practices for menu customization and user-friendly navigation
- Find solutions to common menu editing challenges and troubleshooting techniques
Understanding WordPress Menus
A menu in WordPress is a fundamental component of website navigation. It consists of a list of links that is typically displayed at the top of your site, allowing visitors to easily navigate through your website’s pages and content.
WordPress menus are highly customizable and can include various menu items. Menu items are links to pages, posts, or custom URLs, making it easy for users to access specific content on your website.
Submenus, also known as dropdown menus, are an essential feature of WordPress menus. They allow you to organize and categorize your menu items, creating a hierarchical structure that enhances the user experience.
Advantages of WordPress Menus:
- Enhanced website navigation: WordPress menus provide a streamlined and intuitive navigation experience for visitors.
- Effortless organization: With submenus, you can categorize and group menu items, ensuring easy access to related content.
- Flexibility and customization: WordPress menus can be customized to match your website’s branding and design, giving you full control over the appearance and functionality.
Understanding how WordPress menus work is crucial before you can start editing and customizing them to suit your website’s needs. Now that we have a clear understanding of WordPress menus, let’s explore how to access and edit them in the next section.
In the next section, we will dive deeper into accessing the WordPress menu editor and making modifications to your menu.
Accessing the WordPress Menu Editor
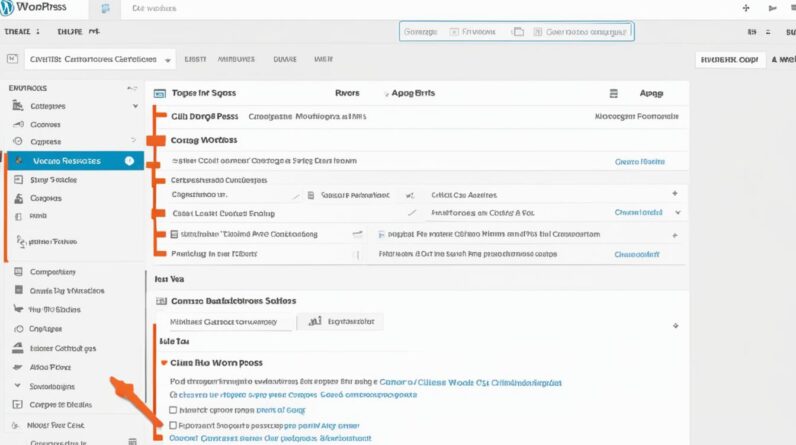
To edit your WordPress menu, you need to access the WordPress menu editor. This powerful tool allows you to make changes to your menu structure and appearance. The location of the menu editor may vary depending on your WordPress theme, but it can usually be found in the dashboard under the “Appearance” section.
If your theme supports it, you may also be able to edit the menu using the site editor or the customizer. These options provide a more visual and intuitive interface for customizing your menu.
Once you access the menu editor, you can start making changes to your menu, such as adding, rearranging, and removing menu items. Let’s take a closer look at how to access the WordPress menu editor and make the most out of its features.
Accessing the Menu Editor in the WordPress Dashboard
To access the menu editor in the WordPress dashboard, follow these steps:
- Log in to your WordPress website and navigate to the dashboard.
- Click on the “Appearance” tab in the sidebar menu.
- Select “Menus” from the dropdown menu.
- You will now be in the menu editor, where you can see the current structure of your menu and make changes as needed.
The menu editor provides a user-friendly interface for managing your menu items. You can easily add new menu items by selecting pages, posts, categories, or custom links. Rearranging menu items is as simple as dragging and dropping them into the desired position. You can also create submenus or dropdown menus by indenting menu items.
Customizing Your Menu Appearance
In addition to managing the structure of your menu, the WordPress menu editor also allows you to customize its appearance. Here’s how:
- In the menu editor, click on the “Manage Locations” tab.
- Here, you can assign your menu to different menu locations on your site, such as the header, footer, or sidebar. The available locations may vary depending on your theme.
- To customize the appearance of your menu, click on the “Customize” button next to the menu location you want to modify.
- This will open the WordPress customizer with options specifically for the selected menu location. Here, you can change the colors, fonts, and other styling options to match your site’s design.
Save and Preview Your Changes
Once you have made the desired changes to your menu structure and appearance, don’t forget to save your changes. You can do this by clicking the “Save Menu” button in the menu editor. After saving, you can preview your changes by visiting your website and navigating through the menu.
| Menu Editor Features | Benefits |
|---|---|
| Easy customization | Ability to add, rearrange, and remove menu items effortlessly |
| Visual interface | Option to edit and customize your menu using the site editor or customizer |
| Structure management | Create submenus and organize your menu items hierarchically |
| Appearance customization | Customize the colors, fonts, and styling of your menu to match your site’s design |
Editing Your Menu in the WordPress Dashboard
When it comes to editing your menu, the WordPress dashboard offers a user-friendly interface that makes the process quick and straightforward. With just a few clicks, you can add new menu items, rearrange them, create submenus, customize the appearance, and assign your menu to different locations on your site.
Let’s explore each of these editing options in more detail:
Adding Menu Items
Adding new menu items to your WordPress menu is a breeze. Simply access the menu editor and select the desired pages, posts, categories, or custom links to include in your menu. You have the flexibility to choose any content from your site and add it to your menu with ease.
Rearranging Menu Items
Customizing the order of your menu items is as simple as dragging and dropping. The WordPress dashboard allows you to rearrange the order of your menu items to suit your navigation preferences. This feature makes it easy to prioritize important pages or highlight specific content for your visitors.
Creating Submenus
If you want to organize your menu items into categories or subcategories, you can create submenus or dropdown menus. By indenting menu items under other items, you can easily create a hierarchical structure in your menu. This allows for a more organized and intuitive navigation experience for your site visitors.
Customizing Menu Appearance
The appearance of your menu plays a crucial role in creating a visually appealing website. With the WordPress dashboard, you can customize the colors, fonts, and overall styling of your menu to match your site’s design and branding. Whether you want a sleek and modern look or a playful and vibrant style, the customization options are endless.
Assigning Menu Locations
In addition to editing the content and appearance of your menu, you can also assign your menu to different locations on your site. You can choose to display your menu in the header, footer, sidebar, or any other location supported by your WordPress theme. This flexibility allows you to optimize your menu’s visibility and accessibility according to your site’s layout and structure.
By utilizing the editing options available in the WordPress dashboard, you can easily modify your menu to enhance your site’s navigation and user experience.
| Editing Options | Description |
|---|---|
| Adding Menu Items | Select pages, posts, categories, or custom links to add to your menu. |
| Rearranging Menu Items | Drag and drop menu items to change their order in the menu. |
| Creating Submenus | Indent menu items to create submenus and organize content hierarchy. |
| Customizing Menu Appearance | Modify colors, fonts, and styling to match your site’s design. |
| Assigning Menu Locations | Choose where your menu is displayed on your site, such as the header, footer, or sidebar. |
Editing Your Menu Using the Full Site Editor (FSE)
If you are using a block theme and have access to the Full Site Editor, you have a powerful tool for editing your WordPress menu. The Full Site Editor provides a visual interface that makes customizing your menu appearance and adding new menu items a breeze. With just a few clicks, you can create a menu that perfectly complements your website’s design.
The Full Site Editor allows you to use blocks to insert pages, posts, custom links, and even additional elements like search bars or social icons into your menu. This means you can create a menu that not only guides your visitors but also enhances their browsing experience. Whether you want to showcase your latest blog posts or direct users to specific sections of your site, the Full Site Editor gives you the flexibility to do so.
One of the standout features of the Full Site Editor is the control it provides over your menu’s layout and design. You can easily change fonts, colors, and other styling options to match your brand’s aesthetic. Whether your website has a minimalist style or a vibrant look, the Full Site Editor ensures that your menu seamlessly integrates into the overall design.
Adding new menu items is also a breeze with the Full Site Editor. Simply select the block you want to add, whether it’s a page, post, or custom link, and place it directly into your menu. This gives you the freedom to create a menu that goes beyond simple navigation and truly showcases your site’s content.
With the Full Site Editor, menu editing becomes a seamless and enjoyable process. The intuitive interface and powerful features empower you to create a menu that is both functional and visually appealing. Take advantage of the Full Site Editor’s capabilities to customize your menu and make it truly stand out.

| Pros | Cons |
|---|---|
| Visual interface for easy editing | Only available for block themes |
| Customize menu appearance with fonts and colors | May require some familiarity with block editing |
| Add new menu items using blocks | Not compatible with all WordPress themes |
| Flexible layout and design options |
With the Full Site Editor, you have the power to create a menu that captures your website’s essence and guides your visitors through a seamless navigation experience. Embrace the potential of the Full Site Editor and transform your menu into a standout feature of your WordPress site.
Editing Your Menu Using a Plugin
If you want more advanced menu editing capabilities, you can use a plugin like Max Mega Menu. This plugin allows you to create and customize mega menus with multi-column dropdowns. Mega menus are an excellent option for websites with a lot of content pages or eCommerce stores.
With the Max Mega Menu plugin, you have the power to configure the display, styling, and functionality of your mega menu. You can easily add widgets, apply custom CSS, and create dynamic menu items.
By using this plugin, you have greater flexibility and control over your menu design, ensuring it aligns with your website’s unique needs. Whether you want to showcase a large number of pages or products, Max Mega Menu enables you to create a visually appealing and user-friendly menu.
| Key Features of Max Mega Menu | Benefits |
|---|---|
| Customizable Mega Menus | Design attractive menus with multiple columns and dropdowns |
| Widgets Support | Add dynamic elements like search bars or social icons to your mega menu |
| Advanced Styling Options | Apply custom CSS to match your menu with your website’s branding |
| Dynamic Menu Items | Create menu items that automatically update based on specific conditions |
With Max Mega Menu, you can enhance your menu’s visual appeal, improve user experience, and provide easier navigation for your website visitors.
Using CSS to Edit Your Menu on WordPress
If you have coding skills and want complete control over the design of your WordPress menu, you can use CSS to customize it. CSS (Cascading Style Sheets) allows you to specify the styles and layout of your menu elements. With CSS, you can change fonts, colors, sizes, spacing, and more using CSS properties, resulting in advanced menu customization.
By adding custom CSS code to your WordPress theme, you can achieve unique and personalized menu styles that perfectly match your branding. The possibilities are endless when it comes to menu customization with CSS. You can create eye-catching menus that enhance the overall user experience on your website.
Editing your menu with CSS requires a good understanding of CSS syntax and selectors. You will need to familiarize yourself with CSS properties and how they affect the different elements of your menu, such as the menu items, dropdowns, and hover effects. By manipulating these properties, you can create a menu design that stands out and aligns with your visual identity.
Here are some ways you can use CSS to edit your menu:
- Change font styles and sizes to match your website’s aesthetic.
- Adjust colors and backgrounds, creating a cohesive visual experience.
- Add spacing and margins to enhance readability and visual hierarchy.
- Apply hover effects and animations for interactive menus.
When editing your menu with CSS, it’s essential to test your changes across different devices and screen sizes to ensure a consistent and responsive design. This will help guarantee that your menu remains user-friendly and accessible to all visitors.
To get started with CSS customization for your WordPress menu, you’ll need access to the CSS files of your theme. Most WordPress themes provide a dedicated area where you can add custom CSS code. Alternatively, you can use a CSS plugin that allows you to make changes without modifying the theme files directly.
Remember, a well-designed and visually appealing menu can significantly improve the overall user experience on your website. Take the time to explore and experiment with CSS to create an advanced menu design that sets your website apart.
Next, I will discuss some essential tips for menu customization to ensure a seamless navigation experience for your users.
**Note**: The image above visually represents the concept of menu customization with CSS.
Tips for Menu Customization
When editing your WordPress menu, it’s essential to follow some best practices to ensure a user-friendly and effective navigation experience. Here are some tips to help you customize your menu:
- Keep your menu structure clear and organized: Create a logical hierarchy of menu items that reflects the structure of your website. Use main menu items to represent top-level pages or categories, and arrange submenus to categorize related content.
- Use descriptive and concise labels: Opt for clear and concise labels that accurately represent the content of the linked pages. Avoid vague or generic phrases that might confuse users and make it harder for them to navigate your site.
- Consider mobile-friendliness: With the increasing use of mobile devices for browsing, it’s crucial to optimize your menu for mobile screens. Use responsive design techniques to ensure your menu adapts well to different devices and screen sizes. Prioritize touch-friendly interactions to enhance the mobile user experience.
- Test your menu: To ensure a seamless user experience across all platforms, test your menu on different devices and screen sizes. Make sure it displays correctly and functions properly, allowing users to access all menu items without any issues.
By following these best practices, you can create a menu that provides a user-friendly navigation experience, with a clear structure and seamless functionality.
| Best practices for menu customization | User-friendly navigation | Clear menu structure | Mobile-friendly menus |
|---|---|---|---|
| Keep your menu structure clear and organized | Create a logical hierarchy of menu items | Use descriptive and concise labels | Consider mobile-friendliness |
| Use responsive design techniques | Optimize for touch screen interactions | Test your menu on different devices | Ensure it works well across all platforms |
Common Menu Editing Challenges and Solutions
Menu editing in WordPress can sometimes present challenges, resulting in difficulties and errors. It’s not uncommon to encounter issues such as menu items not appearing correctly, submenus not functioning as intended, or conflicts with menu styling. These obstacles can hinder the seamless navigation experience you strive to provide for your website visitors. However, rest assured that there are solutions available to troubleshoot and overcome these menu editing difficulties.
If you’re facing any of the following common challenges, here are some practical solutions to help you fix broken menus and resolve menu editing issues:
1. Menu items not appearing correctly: This problem can occur due to various reasons, such as incorrect menu settings or conflicts with other WordPress plugins or themes. To address this issue, first, clear your website’s cache to ensure you’re viewing the most up-to-date version of your menu. If that doesn’t solve the problem, try disabling any conflicting plugins temporarily to identify the culprit. Additionally, check your theme’s documentation or support resources for specific menu-related settings that may need adjustment.
2. Submenus not working as intended: Submenu functionality may be affected by formatting errors or incorrect settings. Ensure that you’ve properly nested submenu items under their respective parent menu items. Check the indentation and hierarchy to ensure a clear structure. If submenus still aren’t functioning correctly, review any applicable theme or plugin settings related to submenu behavior. Consult the documentation or support forums for your specific theme or plugin for troubleshooting guidance.
3. Menu styling conflicts: Sometimes, menu styling conflicts can occur when CSS rules from different themes or plugins clash. To overcome this challenge, try inspecting the problematic menu element using your browser’s developer tools. Identify the conflicting CSS rules and utilize more specific selectors or custom classes to target and modify the menu styling. Alternatively, use inline CSS or a child theme to override conflicting styles and ensure consistent and visually appealing menu design.
If the above solutions don’t resolve your menu editing difficulties, don’t hesitate to seek further assistance. The WordPress support community is an invaluable resource where you can post your questions and seek guidance from experienced users. Additionally, if you require more personalized and in-depth help, consider hiring a WordPress developer who can analyze and rectify any complex menu-related issues specific to your website.
Remember, menu editing challenges are part of the learning process, and with the right troubleshooting techniques and a little patience, you’ll be able to fix broken menus and navigate your way to an optimized and user-friendly menu for your WordPress website.
Conclusion
After following the step-by-step guide provided in this article, you now have the knowledge and tools to confidently edit and customize your WordPress menu. By modifying your menu, you can enhance your website’s user experience and improve navigation for your visitors.
Whether you choose to use the built-in menu editor, advanced plugins, or CSS, there are numerous options available to suit your specific needs. The WordPress menu editing process is user-friendly and can be easily accomplished with the right instructions.
Remember to keep your menu structure clear and organized, use descriptive labels for menu items, and prioritize mobile-friendliness. These best practices will ensure that your menu is user-friendly and accessible across different devices and screen sizes.
So go ahead and explore the various customization options for your WordPress menu. Get creative, experiment with different styles, and make your menu a true reflection of your website’s brand and identity. Happy menu editing!
FAQ
How do I access the WordPress menu editor?
You can access the WordPress menu editor by going to the dashboard, navigating to the “Appearance” section, and selecting “Menus”.
How do I add new menu items to my WordPress menu?
In the WordPress menu editor, you can add new menu items by selecting pages, posts, categories, or custom links and clicking the “Add to Menu” button.
Can I rearrange the order of menu items in WordPress?
Yes, you can rearrange the order of menu items in WordPress by dragging and dropping them in the menu editor.
How can I create submenus or dropdown menus in WordPress?
To create submenus or dropdown menus in WordPress, you can indent menu items underneath other items in the menu editor.
Is it possible to customize the appearance of my WordPress menu?
Yes, you can customize the appearance of your WordPress menu by changing colors, fonts, and other styling options in the menu editor.
How do I assign my WordPress menu to different menu locations on my site?
In the menu editor, you can assign your WordPress menu to different menu locations, such as the header, footer, or sidebar, by selecting the appropriate menu location option.
Can I edit my WordPress menu directly from the Full Site Editor?
Yes, if you have a block theme and access to the Full Site Editor, you can edit your WordPress menu directly from there by using blocks to add new menu items and customize the appearance.
Are there plugins available for advanced menu editing in WordPress?
Yes, plugins like Max Mega Menu allow for advanced menu editing in WordPress, including the creation and customization of mega menus with multi-column dropdowns.
Can I use CSS to customize the design of my WordPress menu?
Yes, if you have coding skills, you can use CSS to customize the design of your WordPress menu by specifying styles and layout properties for menu elements.
What are some best practices for menu customization in WordPress?
Some best practices for menu customization in WordPress include keeping the menu structure clear and organized, using descriptive labels for menu items, and optimizing the menu for mobile screens and touch interactions.
What can I do if I encounter difficulties or issues while editing my WordPress menu?
If you encounter difficulties or issues while editing your WordPress menu, you can try clearing cache, disabling conflicting plugins, checking theme documentation, or seeking assistance from the WordPress support community or a developer.

